2

Fall DIYs (from the archives)

Friday, September 26, 2014

Fall DIYs by Vitamini Handmade

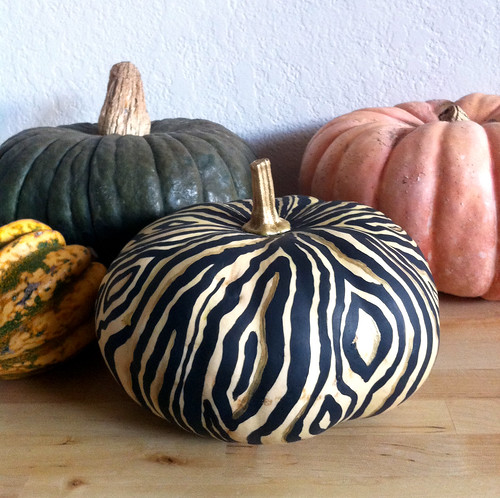
Fall is my absolute favorite time for crafting. It's so easy to get comfortable with a project when it's cool outside and the leaves are falling. I've done a few Fall and Halloween DIYs over the years and thought I'd dust them off to share, in case you're looking for something for a project to start for the weekend. Start off with a faux bois painted pumpkin!

Fall DIYs by Vitamini Handmade

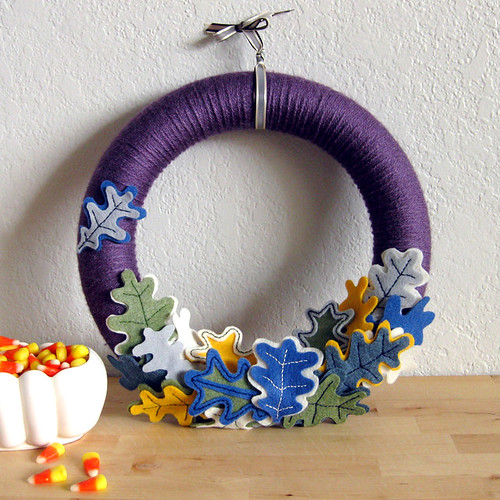
This felt and yarn oak leaf wreath is still one of my favorite projects. Keep it on your front door through Thanksgiving!

Fall DIYs by Vitamini Handmade

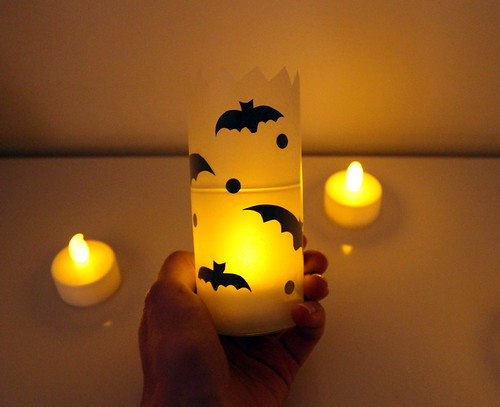
Black cardstock, waxed paper, and a few basic tools are all you need to make these cute Halloween luminaries.
Fall DIYs by Vitamini Handmade

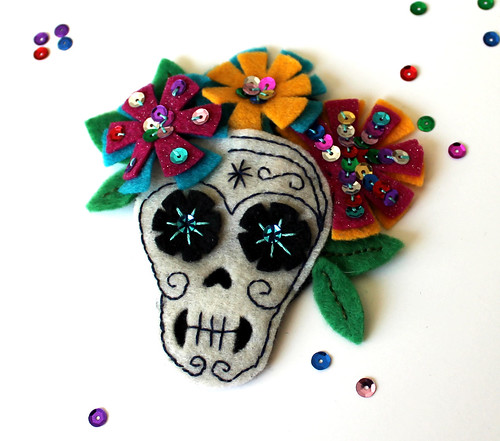
Make this skull headpiece out of felt and embroidery floss!
Fall DIYs by Vitamini Handmade

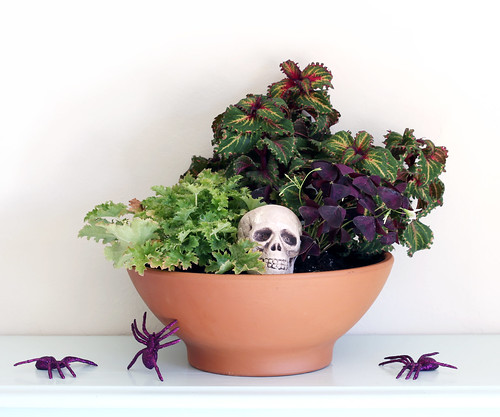
A spooky Halloween planter would look great as a table centerpiece.
Fall DIYs by Vitamini Handmade

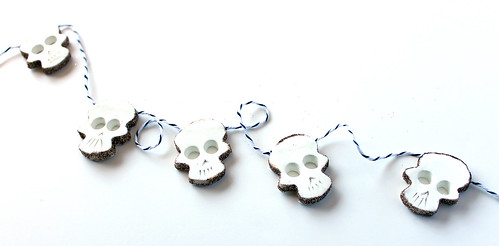
Spice up your party decor with this easy paper clay skull garland.

Fall DIYs by Vitamini Handmade

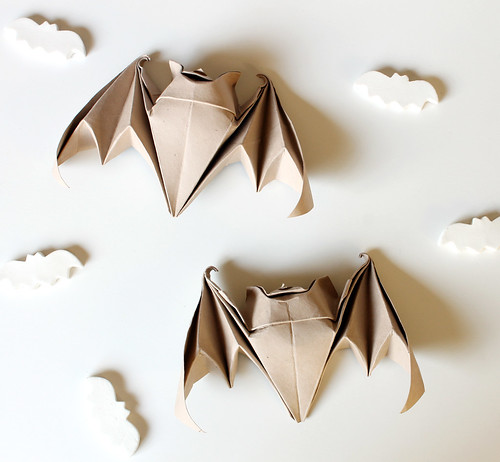
These origami bats are a little challenging to make, but worth the effort!

Fall DIYs by Vitamini Handmade

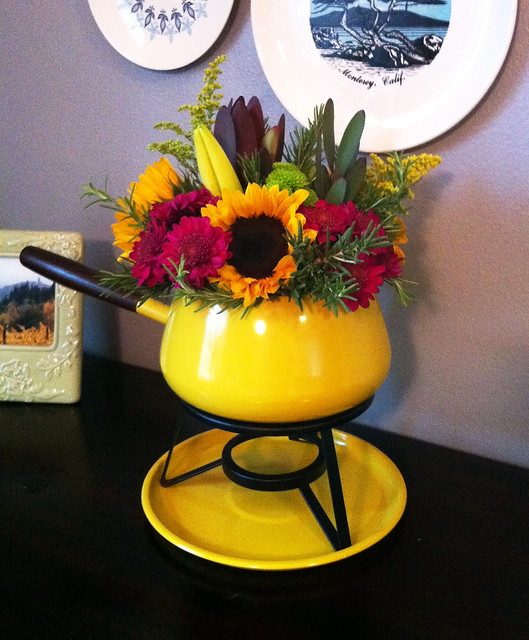
It's not quite a tutorial, but a fall-themed flower arrangement in a fondue pot is a fun idea!
Happy Friday to you!

7

DIY Halloween Candy Boxes

Thursday, September 25, 2014

DIY Halloween Candy Boxes

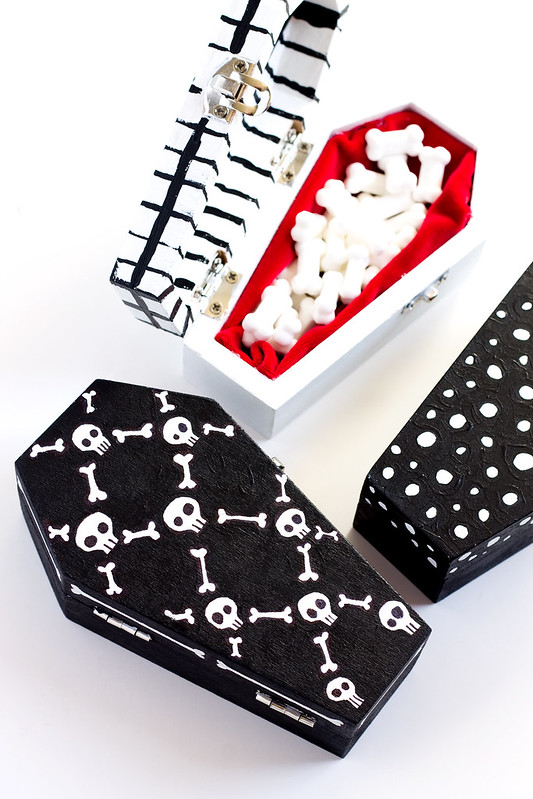
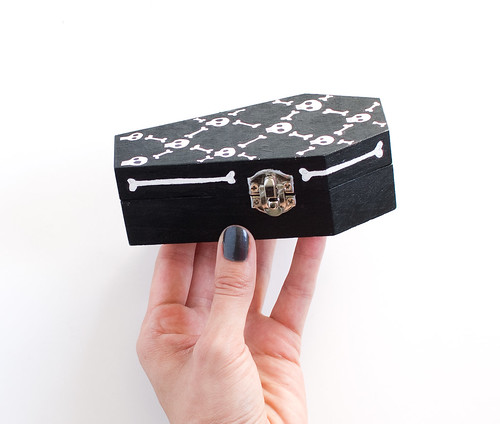
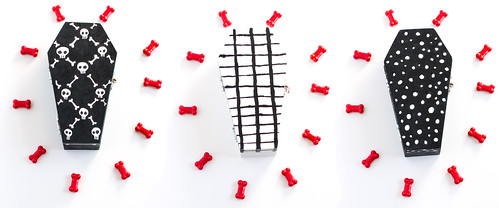
It's the most wonderful time of the year (if you ask me): fall! Halloween is fast approaching so let's get to the Halloween crafting, shall we? I came across these great coffin-shaped wood boxes at Michael's a few weeks back and thought they'd make cool candy boxes. They came out so cute! Here's what you'll need to make your own:
  • wood coffin box (like these but they were about $2 at Michaels)
  • sand paper
  • craft paint in black and white
  • brushes
  • pencil
  • permanent marker (optional)
  • small piece of velvet
  • hot glue gun
  • candy bones
DIY Halloween Candy Boxes

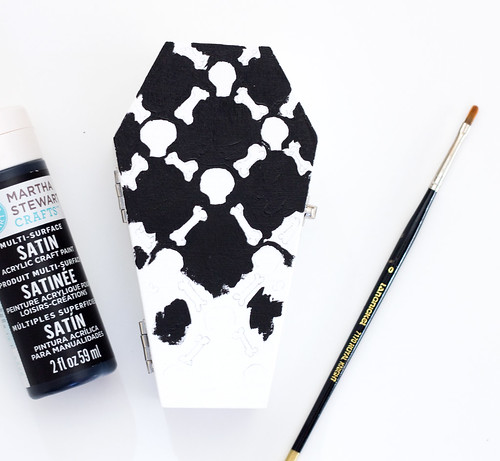
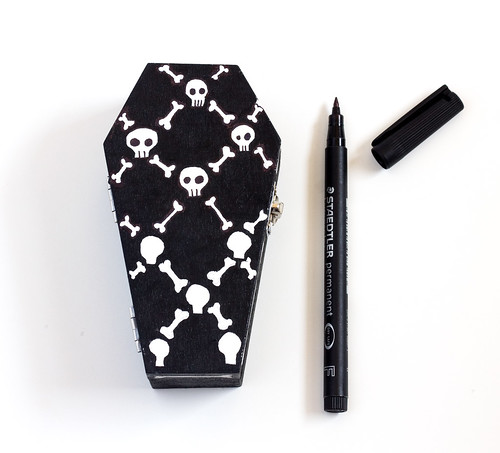
Lightly sand any rough edges off of the box. Paint on a white base coat and let dry. Lightly sketch out the design with a pencil. Dots and stripes are always an easy option. If you're looking for something a little more complex, try this bone and skull design! Rough in the black areas with the paint and then trace around the design with a permanent marker for smaller details. Don't forget to paint the edges!
DIY Halloween Candy Boxes DIY Halloween Candy Boxes

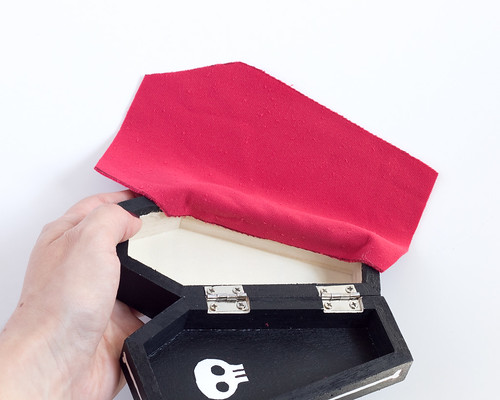
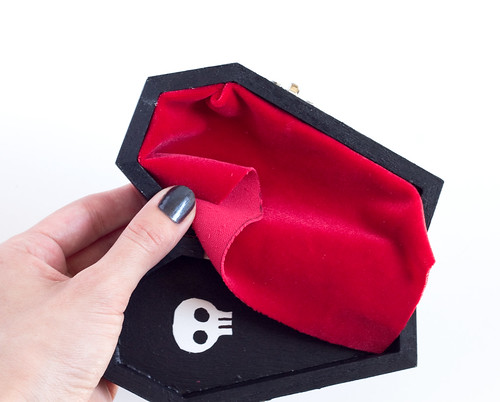
Trace the box on the reverse side of the velvet with an additional 1/2" margin. Cut out following the lines and hot glue one long edge to the inside of the box. Fold a small pleat at the corner and glue the next side down.
DIY Halloween Candy Boxes DIY Halloween Candy Boxes
DIY Halloween Candy Boxes

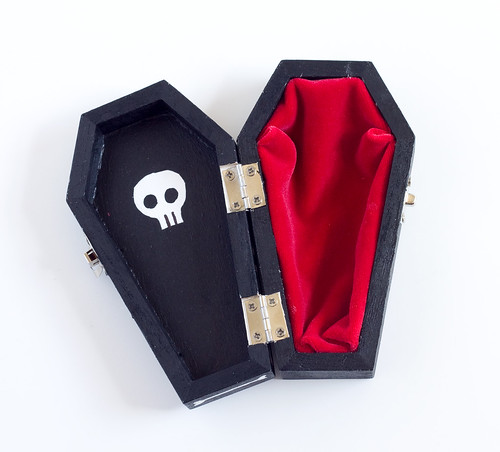
Continue along all of the box edges. Gather the excess velvet at the last open edge of the box, turn under about 1/4" and glue.

Fill with candy bones.
DIY Halloween Candy Boxes DIY Halloween Candy Boxes

These would be nice little gifts for coworkers or party favors. I had so much fun making them and the possibilities for decoration are really endless! 

1

Craftcation 2015

Thursday, September 18, 2014

Craftcation Conference, March 26-29, 2015 | www.vitaminihandmade.com

Just popping in to let you know that Craftcation has opened registration for the spring 2015 conference. I attended earlier this year (I shared some of my experience here) and I can honestly say it was the best thing I did for me and my business. I left feeling refreshed, encouraged, and well equipped to face my creative business goals. Not to mention I made a bunch of friends and had way too much fun! I'm really looking forward to the 2015 session because I'll be a workshop presenter! I'll be teaching a simple screen printing course that may get you hooked on the technique. Click here to learn about more of the other workshops and panels that are already lined up. I know I'm already eying a few that I just have to attend. Can't wait! I hope to see you there!

I took the photo at Craftcation 2014. Can't beat the Ventura Pier!

7

DIY Marbled Paper Tray

Monday, September 15, 2014

DIY Marbled Paper Lined Tray
Hi guys! Things have been busy in my neck of the woods lately. The Re:Make festival in San Francisco was last Saturday. Did you go? What a fun event! I'm also still working on getting settled since my move, and if you follow me on Instagram you'll know that I just adopted a 3 month old dachshund puppy! More on her later, though. If I fall down the rabbit hole of posting pics I won't be able to get back on topic...

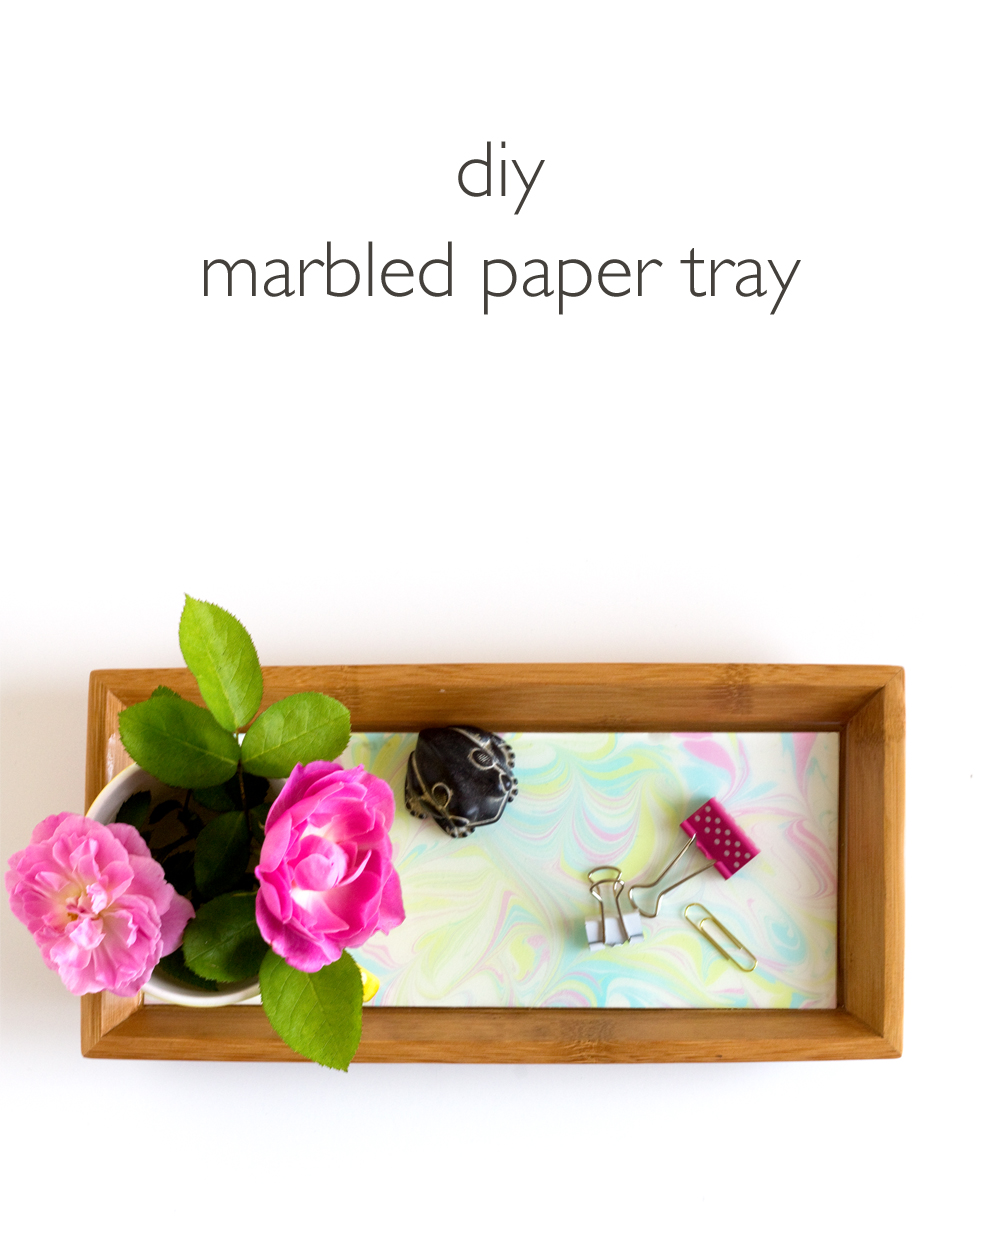
I have a new DIY project that I'm excited to share! Next in my series of projects using hand marbled paper and fabrics is this practical wooden tray lined with pretty marbled paper. Pourable resin seals the paper completely and provides a clean, durable surface. If you don't have any marbled papers handy, any decorative paper can be used for this project!

Here's what you'll need:

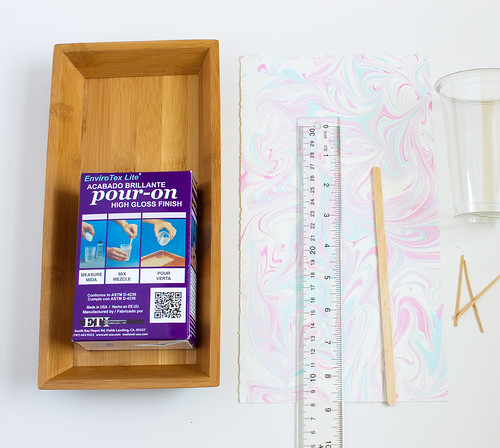
DIY Marbled Paper Lined Tray
  • Wood tray, I found this one at Target
  • EnviroTex Lite Pour-On Resin
  • Marbled paper. Learn how to make your own with my tutorial!
  • Paper trimmer
  • Double-sided tape
  • Plastic mixing cup
  • Stir sticks
  • Ruler
  • ModPodge, foam brush (not pictured)

Measure the bottom of the tray and cut a scrap piece of paper to fit. Test fit the paper in the tray and trim edges where necessary. Trace the outline of paper onto the back side of the marbled paper and cut to size. Using the foam brush, apply three thin coats of ModPodge on the marbled paper, both sides, letting it dry in between coats.

When the paper is dry, add strips of double-sided tape to the back edges and center of the paper and lay it into the bottom of the tray.
DIY Marbled Paper Lined Tray

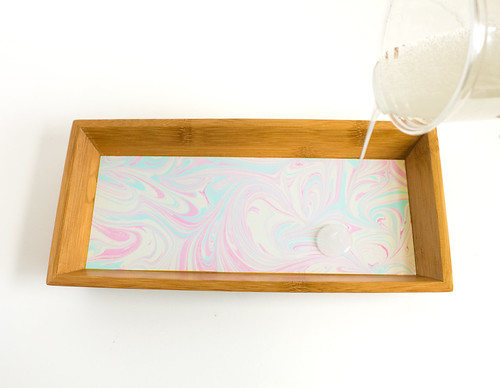
Following the instructions on the package, mix the epoxy and the hardener together in the cup. Slowly pour it over the paper until fully coated with less than 1/8" of coverage. Spread the resin into the corners and edges where necessary with the stir sticks. If there are bubbles, carefully exhale onto the surface of the resin (like you would while cleaning your sunglasses) and the bubbles will disperse. Work in a well-ventilated area and follow all of the safety precautions on the product packaging.

DIY Marbled Paper Lined Tray

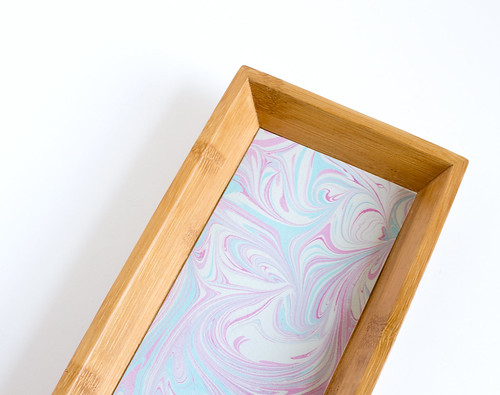
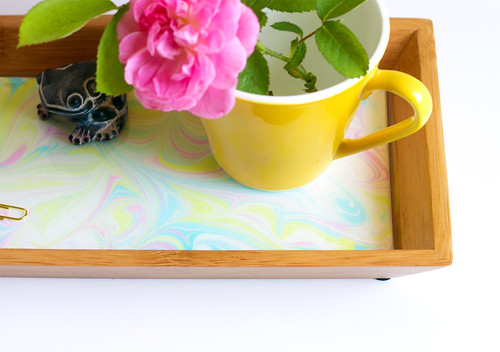
Let dry on a level surface until fully cured. You may notice the marbled paper in the first few photos is different from the finished photos. That's because I forgot to take my own advice and coat the paper in Modpodge first. Oops! It's important to seal the paper before pouring the resin because it will otherwise saturate the paper and leave a blotchy look. Sealing keeps the colors crisp and vibrant, so that's definitely what I recommend and what I did the second time around! Add another layer of resin if it is thin in some spots or if the paper sticks up in any areas.

DIY Marbled Paper Lined Tray
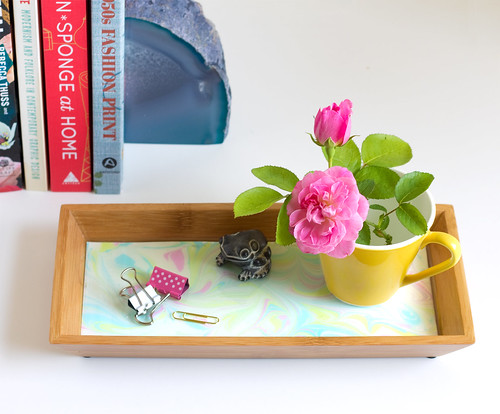
Use your new tray as a catch-all by the front door or to hold office supplies at your desk. It's a fun way to bring in a pop of custom color and pattern!

DIY Marbled Paper Lined Tray

Click here to learn how to marble your own paper and fabrics and here to learn how to make a marbled fabric and leather clutch!

22

Shop Updates!

Friday, September 5, 2014

vtwonen

Hi friends! There's a lot going in the Vitamini studios these days as I prepare for the up-coming holiday season, so here's a little update!

I was so thrilled to see a Vitamini screen print in this beautiful styled shot by vtwonen, via sfgirlbybay last week. I kicked things into high gear this week and now have these prints back in stock! Available in hot pink and black on thick, 100% cotton stock. You can find both in my shop, here.


I'm also getting ready for Re:Make in San Francisco! Come out to Fort Mason, September 13th to shop top-notch handmade brands and even make some crafts yourself! It's guaranteed to be a good time.

Happy friday to you!

249

DIY Leather & Fabric Clutch

Tuesday, September 2, 2014

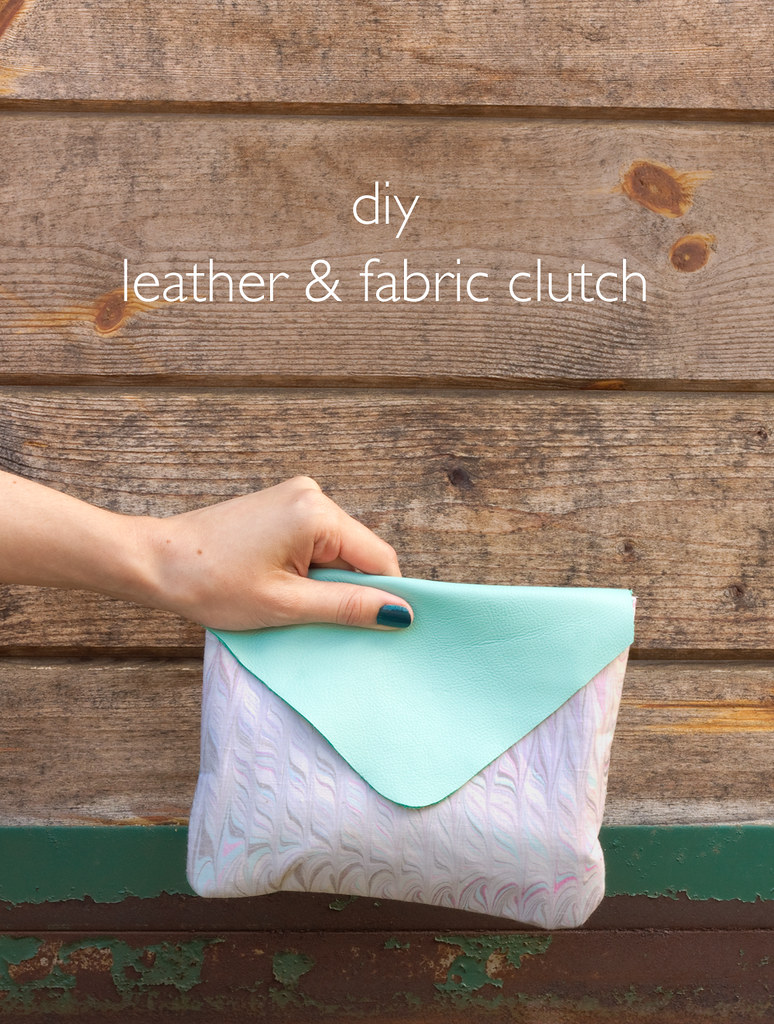
DIY Leather & Marbled Fabric Clutch | click through for the tutorial! Remember the marbled paper and fabric tutorial I shared a while back? This is the first of a series of posts sharing projects that can be made with these pretty, custom papers and fabrics! Kicking it off is this simple, classic clutch made with a soft leather back and marbled fabric front. It's so easy to make, you may want to whip up a few!

Here's what you'll need:
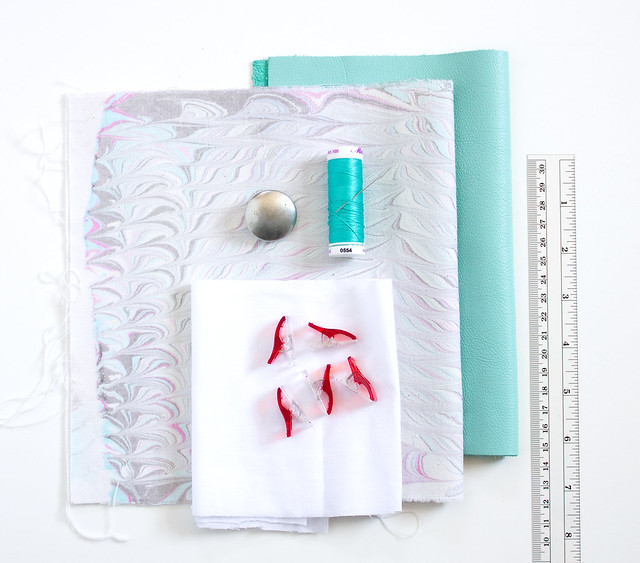
DIY Leather & Fabric Clutch
  • Piece of leather, 8.5" x 11" I found this one at Michael's
  • Accent fabric, 13" x 8.5". I used a piece I marbled myself! Click over to my tutorial to learn how to make your own custom print
  • Scrap cardboard
  • Permanent marker
  • Heavyweight fusible interfacing, 6.5" x 8.5"
  • Wonder Clips or binder clips
  • Sewing machine with a needle for leather
  • Ruler
  • Scissors
  • Optional: button and needle & thread
DIY Leather & Fabric Clutch
Start by drawing a template for the leather onto the scrap cardboard. I knew the front of my bag would start at 6.5" tall. So that would leave 5.5" for the flap. Mark the center point of the flap and trace something round at the end, like a roll of tape. Then draw lines at angles from the side corners to the edge of the circle.
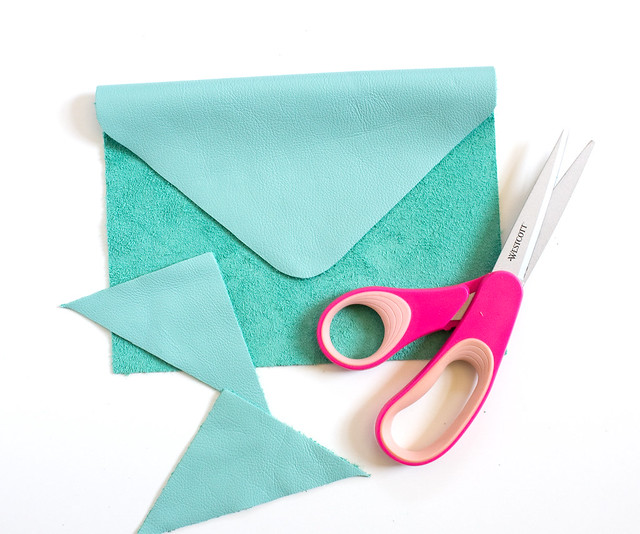
DIY Leather & Fabric Clutch

Trace onto the wrong side of the leather with a permanent pen and trim to size.
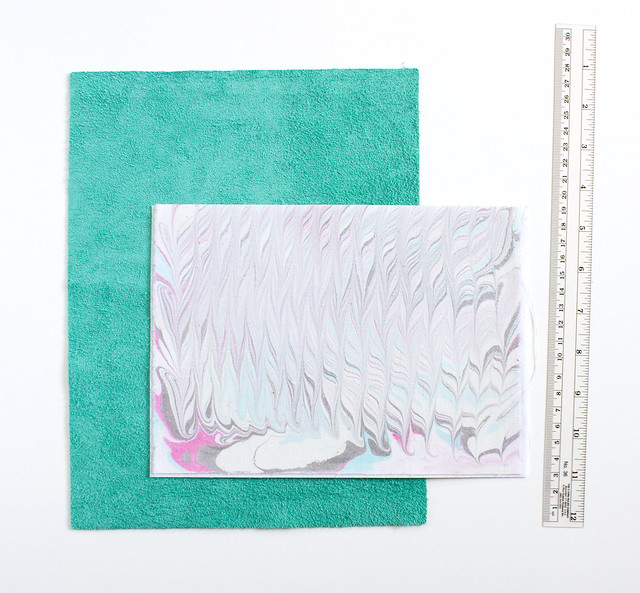
DIY Leather & Fabric Clutch Following the interfacing instructions, iron it onto the wrong side of one end of the accent fabric. Fold the remaining fabric over and press. This will give you patterned fabric on both sides with interfacing in the middle.
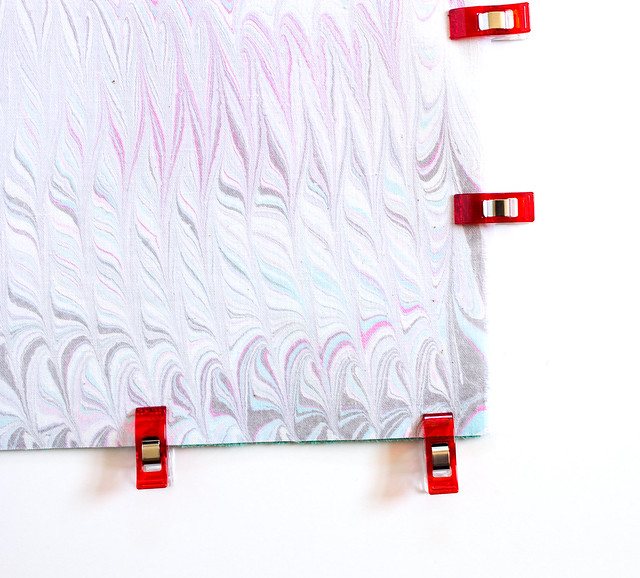
DIY Leather & Fabric Clutch
Clip the wrong sides of the accent fabric and the leather together. The raw fabric edges will be at the sides and the bottom, leaving the nice folded edge to make the top of the bag opening. Pins will leave punctures in the leather so use clips instead. Binder clips work just fine, too, but if you do much sewing I highly recommend wonder clips! They hold bulky items together very well and keep everything flat without the hassle of pins. I love them! Ok, back to the project!

Sew the three sides with an 1/8" seam allowance, making sure to sew backwards for a few stitches at each end. My machine worked much better with the leather side down and the fabric side up. Trim excess fabric or leather at the seams (if necessary) and turn right side out.
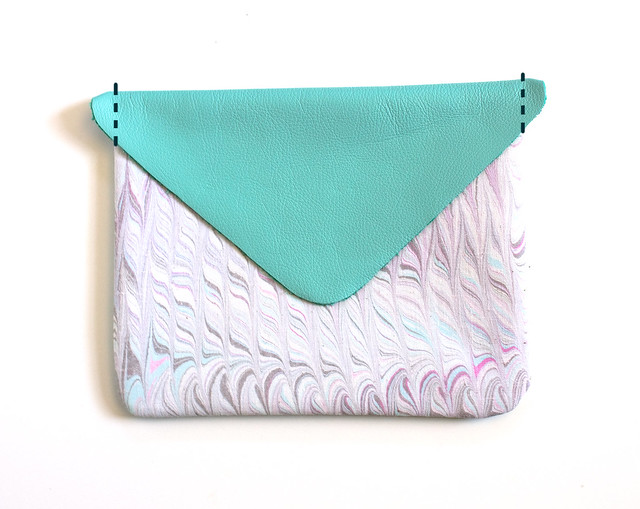
DIY Leather & Fabric Clutch
I forgot to account for the seam allowance when I made my template (oops!), so I had little extra pieces of leather sticking out on the flap. I just trimmed it back on both sides.
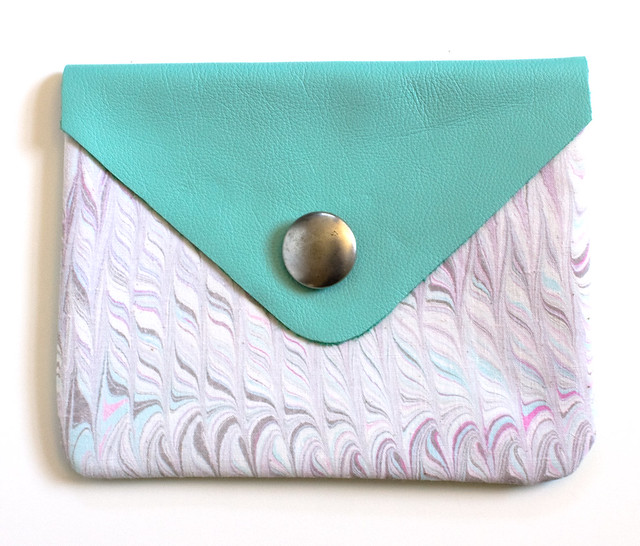
DIY Leather & Fabric Clutch
If you'd like, add a button closure to the flap. Position the button on the flap and lightly mark its placement with a pen. Cut an opening in the leather as wide as the button. Sew the button onto the fabric, aligning it with the opening. I liked mine just fine without the button, so I skipped that step.
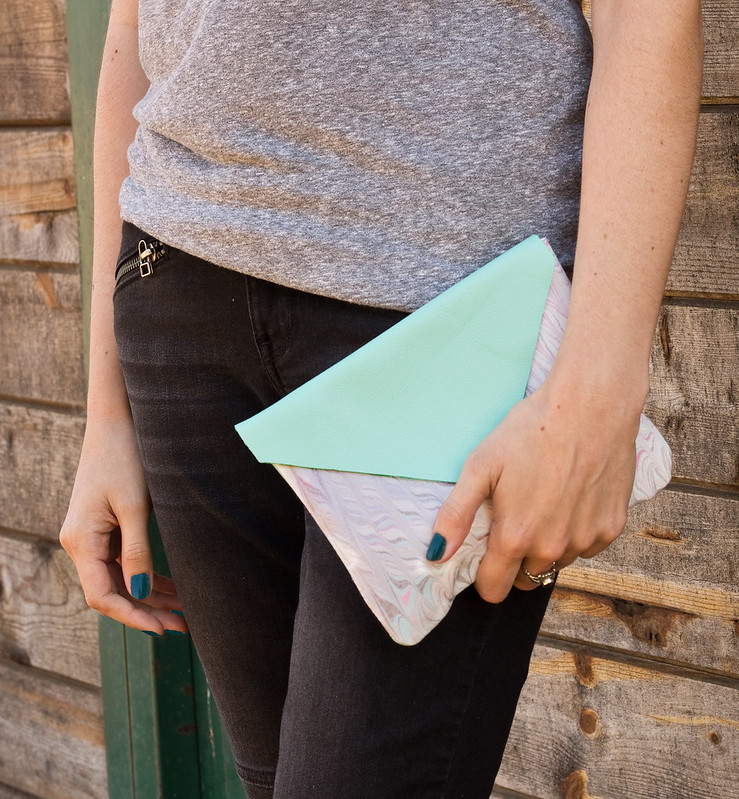
DIY Leather & Fabric Clutch

Enjoy your new, handmade clutch! It's a nice size for carrying a few necessities when you're headed out for coffee or dinner.
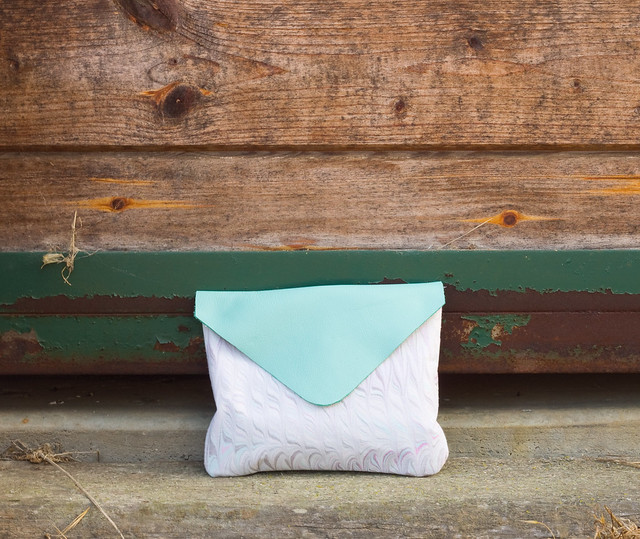
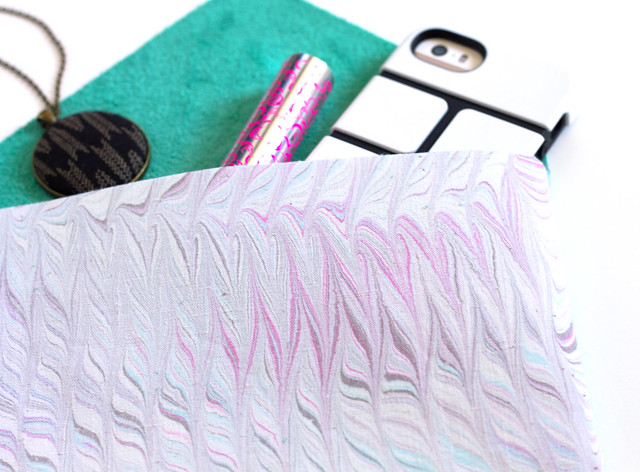
DIY Leather & Fabric Clutch DIY Leather & Fabric Clutch
 

vitamini handmade © All rights reserved · Theme by Blog Milk · Blogger